fix blurry old photo with AI
Fix Blurry Old Photo With AI
Use AI to improve blurry old photos by sharpening important details, reducing haze, and keeping the restored image natural.
Quick Answer
To fix blurry old photo with AI, upload the clearest available file and ask for natural sharpening, contrast recovery, and detail enhancement. AI can improve many soft or faded photos, but it cannot recover perfect detail from information that was never captured.
The goal is a believable improvement. Over-sharpening can create plastic skin, strange eyes, or artificial textures. A careful prompt helps the model enhance the image without making it look invented.
Step-by-Step Tutorial
Use this workflow when blur is the main problem.
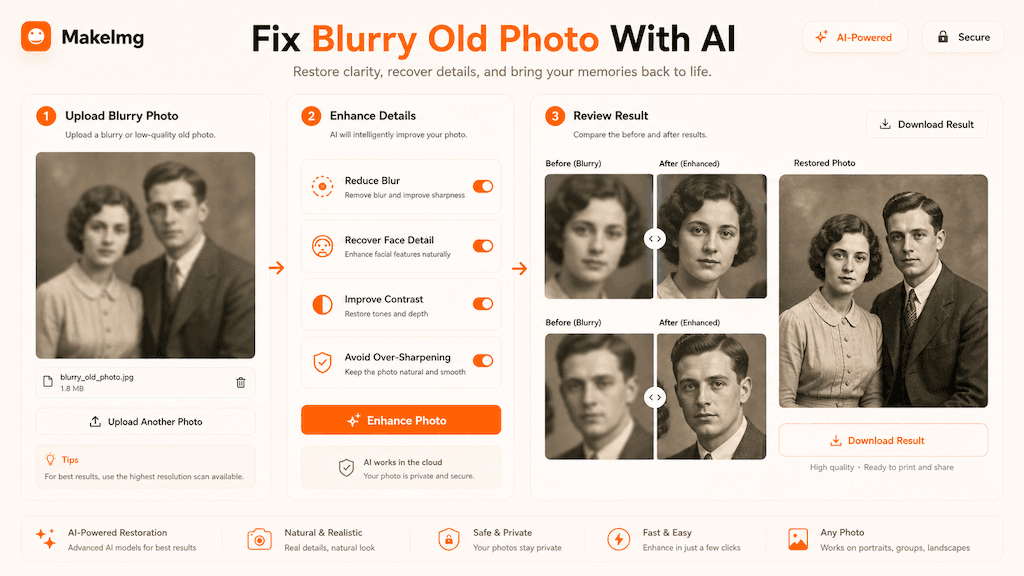
- 1
Find the highest-resolution copy
Avoid screenshots or compressed messenger files when possible. A larger scan gives the AI more real detail to work with.
- 2
Crop only if needed
If the subject is tiny in a large scan, crop around the important area while keeping enough context for natural restoration.
- 3
Ask for natural detail enhancement
Use phrases like improve clarity, reduce blur, preserve natural face details, and avoid over-sharpening.
- 4
Review faces and hands closely
Faces and hands reveal restoration errors quickly. If they look artificial, try a more conservative prompt.
- 5
Keep the restored file separate
Save the original and the enhanced version. This makes it easier to compare and regenerate later with better settings.
Best Use Cases
AI blur repair is useful for old portraits, family albums, school photos, scanned prints, and low-contrast archive images. It works best when the photo is soft but still contains visible structure.
It is less reliable when the image is extremely small, motion-blurred, or heavily damaged. In those cases, AI may create plausible details rather than recover accurate ones.
Prompt Suggestions
Ask for enhancement, not reinvention.
- Fix this blurry old photo with natural AI enhancement, improve clarity and facial detail, reduce haze, keep realistic texture.
- Sharpen this old portrait gently, preserve identity, reduce blur, improve contrast, no dramatic beauty filter.
- Enhance this faded and blurry family photo, natural restoration, clearer details, balanced lighting, realistic result.
Quality Checklist Before You Generate
Restoration quality is about believable improvement rather than dramatic reinvention. The photo should look clearer, cleaner, and easier to share while still feeling faithful to the original memory. For a fix blurry old photo with AI workflow, start by deciding what success looks like before you press generate. The output may be attractive, but it still needs to solve the original task: clearer restoration, a stronger reaction, a more natural composition, or a cleaner edit.
Check the input first. Make sure the source image, prompt, style choice, and final format all point in the same direction. If you are using MakeImg Restore, keep the instruction short enough for the model to follow and specific enough that it cannot ignore the main request.
- One clear subject or task is easier to control than several competing goals.
- Simple backgrounds usually improve readability and reduce unwanted artifacts.
- Consistent style words help the model keep the result cohesive across a full set.
- Download only after checking the result at the size where it will actually be used.
Common Mistakes to Avoid
The most common mistake is over-correcting a fragile source image. Heavy sharpening, aggressive colorization, or beauty-style language can make restored faces look artificial. This matters for SEO-style tutorial workflows too: people searching for fix blurry old photo with AI usually want a usable result quickly, not a complex art experiment that needs many manual fixes afterward.
Before downloading, compare the restored result with the original at normal size and at full size. Look especially at eyes, hands, hair, clothing edges, and background texture. If the first result is close but not ready, change one variable at a time. Edit the emotion list, simplify the style, clarify the reference roles, or narrow the edit instruction. Changing everything at once makes it hard to learn what improved the output.
Keep the original file and the generated result separate. That gives you a clean rollback point, makes comparison easier, and helps you regenerate later if you find a better prompt or model provider.
Publishing and Reuse Notes
After the output is ready, name the file in a way that matches the task, such as fix-blurry-old-photo-with-ai. Clear filenames make it easier to find the asset later, especially when you are testing several MakeImg workflows in the same week.
If you plan to publish the image publicly, review rights, privacy, and context before posting. Use source material you own or have permission to use, avoid misleading claims, and keep a copy of the prompt so you can explain or reproduce the creative process later.
- Save the final image and the source image in the same project folder.
- Keep a short note with the prompt, style, and tool path used for generation.
- Recheck the output on mobile because most meme and social images are consumed there.
FAQ
Practical limitations and tips.
Can AI fully unblur any old photo?
No. AI can improve perceived clarity, but severe blur may require the model to guess missing detail.
Why does the restored face look different?
The source may not contain enough detail, or the prompt may be too aggressive. Ask for conservative restoration and compare against the original.
Should I upscale before restoring?
Usually start with restoration first. Upscaling a poor-quality image can enlarge artifacts before they are repaired.
Create with MakeImg
Use this guide as a starting point, then try the matching MakeImg tool to generate, restore, compose, or edit your own images.
Open the tool